This article contains affiliate links. If you purchase through these links, I may earn a commission at no extra cost to you. Our recommendations are based on our independent research and editorial judgment. Here is how it works
Kindles have quietly become one of the most popular study tools among students. High school students use them for assigned reading. College students use them for textbooks and research papers. Competitive exam aspirants use them to carry entire libraries of prep material in one slim device. The reasons are simple.
A Kindle is lighter than a backpack full of textbooks. It has no notifications, no social media, and no browser tabs competing for attention. Battery life is measured in weeks, not hours, so students rarely need to worry about charging it before an exam. The E Ink screen looks like paper, not a backlit phone screen, which reduces eye strain during long study sessions. It also fits an entire library into one device, including textbooks, PDFs, class notes, and research papers.
However, most students only scratch the surface. They read, they turn pages, and that’s it. Kindle actually has dozens of built-in features designed for exactly this kind of deep, repeated, exam-focused reading. Highlighting systems, vocabulary tools, PDF handling, accessibility features, and organization tools all exist on the device already. Most students simply never turn them on.
This ‘Kindle for Students’ guide walks through 25 practical tips that turn a Kindle from a simple reading device into a real study tool. Each tip explains what the feature does, why it matters for students, how to use it, and where its limits are. Think of it as a complete handbook, not just a list.
Tip 1 — Master Highlighting
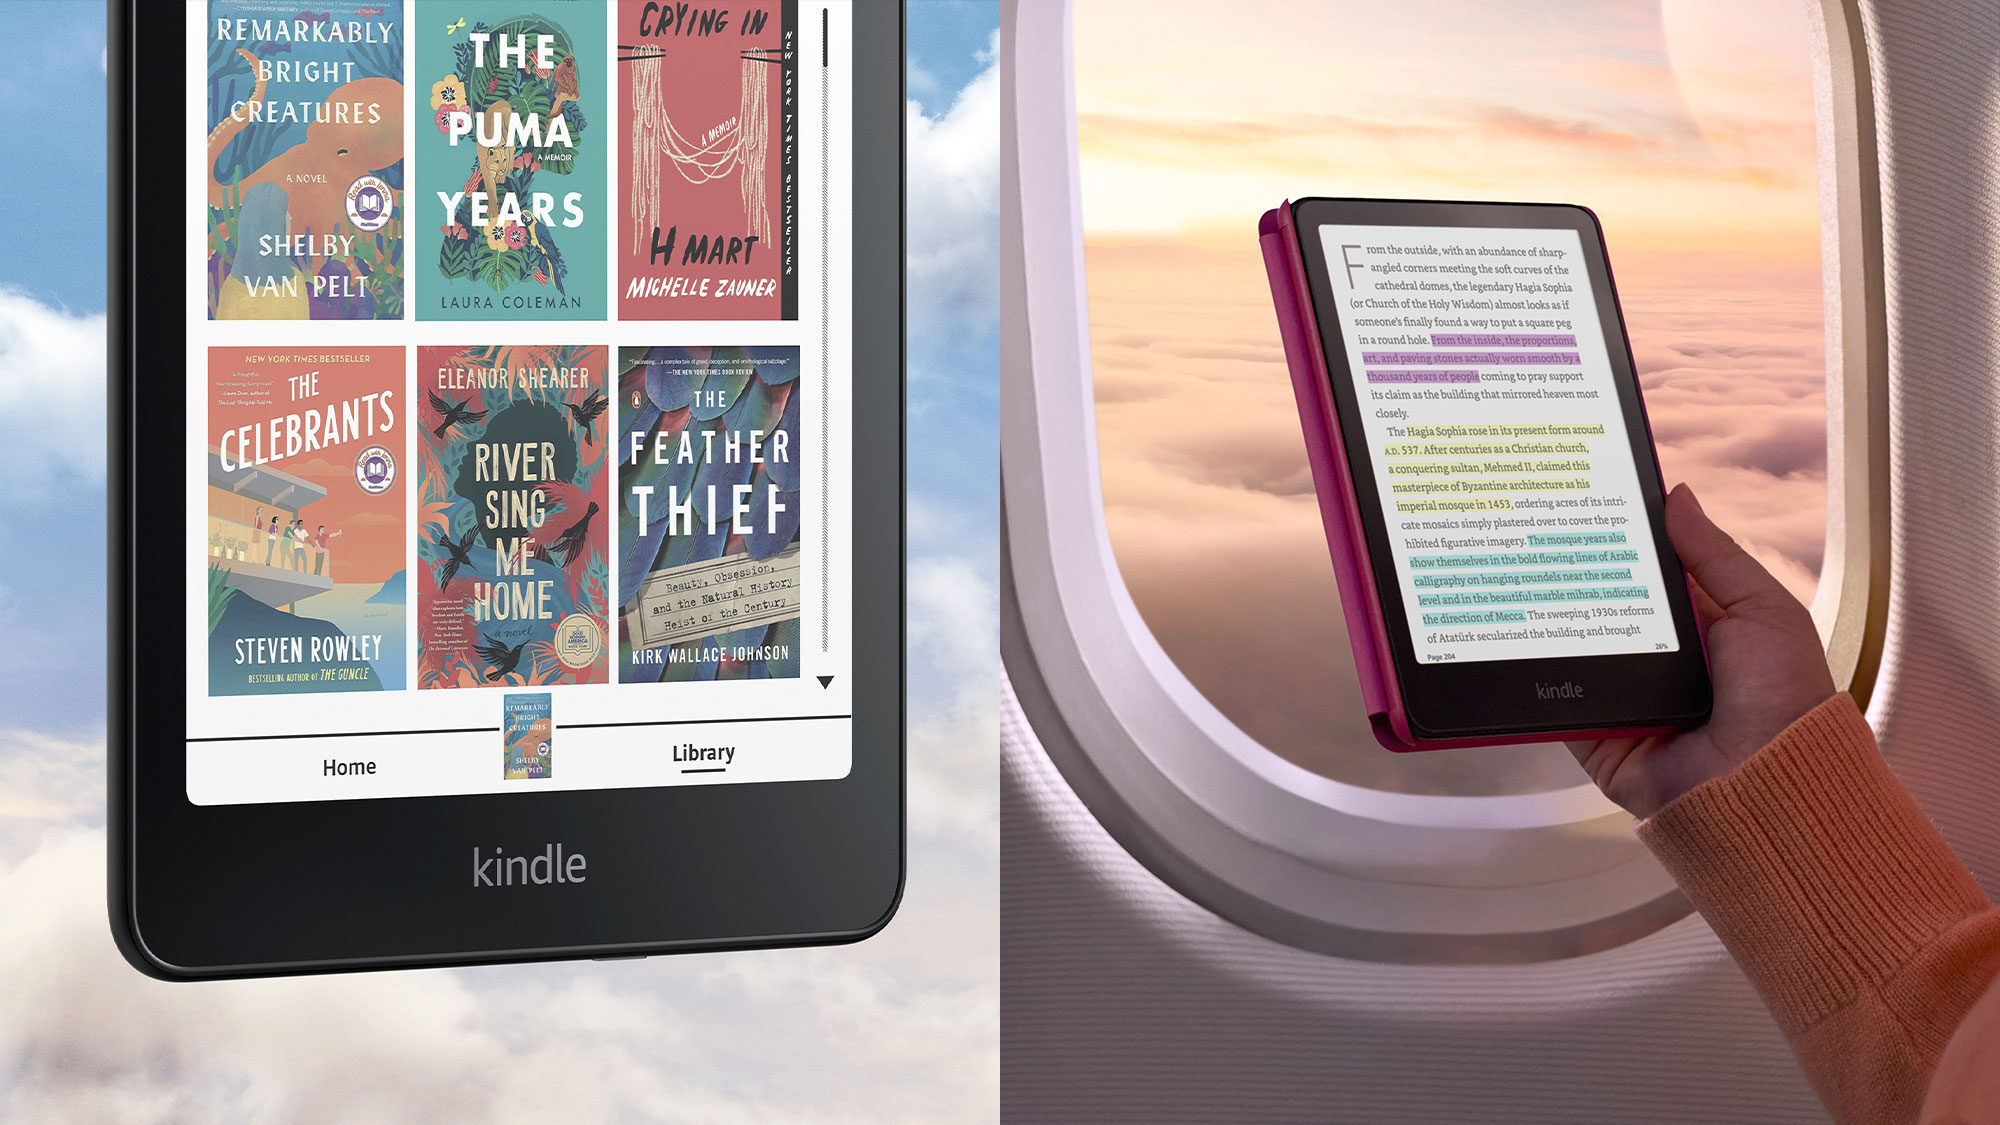
Highlighting is the most basic Kindle feature, but most students use it poorly. A Kindle lets readers highlight passages in several colors, usually yellow, orange, blue, and pink, depending on the device or app. Each highlight is saved automatically and linked to the exact page it came from.
The real value comes from using color with intention. For example, a law student could use yellow for case names, blue for legal principles, and pink for exam-likely arguments. A biology student could use one color for definitions and another for processes.
How to use it:
- Press and hold on the starting word.
- Drag to the end of the passage.
- Tap a color from the popup menu.
Highlighting becomes useful from the very first read-through, but its value grows during revision, when a student can scan just the highlighted text instead of the whole chapter. The main limitation is overuse. Highlighting entire pages defeats the purpose, since nothing stands out anymore.
Tip 2 — Use Notes Like Digital Margin Writing
Notes work alongside highlights. Instead of just marking a passage, a student can attach a short written comment to it, similar to writing in the margin of a physical book.
This is useful for summarizing a paragraph in plain language, recording a question for a professor, or linking one idea to something covered earlier in the course. Notes turn passive reading into active studying.
How to use it:
- Tap and hold the passage.
- Select the note icon.
- Type the note and save it.
Notes are most useful during first reads of dense material and while preparing for essay-based exams, where connecting ideas matters more than memorizing facts. The main limitation is typing speed. The on-screen keyboard is slower than handwriting, though Kindle Scribe owners can write notes by hand instead.

Tip 3 — Review All Highlights in One Place
Every highlight and note gets collected automatically in a feature called Notebook. This means a student never has to flip back through an entire book to find their own annotations.
How to use it:
- Open the book and tap the menu icon.
- Select Notebook to see every highlight and note in one scrollable list.
- On the Kindle app, notes can also be exported by email or copied out for use in a separate study document.
This feature becomes essential the night before an exam, when reviewing five highlighted chapters is far faster than rereading them. Export formatting is basic, so students who want a polished revision document may need to clean it up afterward.
Tip 4 — Build Vocabulary with Vocabulary Builder
Vocabulary Builder automatically saves any word a student looks up in the built-in dictionary. Over time, this creates a personal, book-specific vocabulary list without any extra effort.
How to use it:
- Look up unfamiliar words as usual while reading.
- Open Vocabulary Builder from the Home screen.
- Review saved words as flashcards and mark them “Mastered” once learned.
This feature is especially useful for students working through literature, law, or medicine, where technical or archaic vocabulary appears constantly. It also helps students who are preparing for the GRE or SAT, since both exams reward strong vocabulary recognition. The limitation is that it only tracks words looked up on the device. It will not build a vocabulary list from words a student already knows.
Tip 5 — Use the Built-in Dictionary
The built-in dictionary gives instant definitions without leaving the page. When connected to Wi-Fi, it also offers Wikipedia lookups and basic translation.
How to use it:
- Tap and hold any word.
- Read the definition in the popup.
- Swipe across the popup to see Wikipedia results or a translation, if available.
This is useful anytime an unfamiliar term appears, whether it’s a scientific concept, a historical reference, or a word in a foreign-language text. The main limitation is that Wikipedia and translation require an internet connection, and not every language has a dictionary already installed, so students reading in another language may need to download the correct dictionary first.
Tip 6 — Adjust Font for Better Learning
Kindle allows full control over how text appears on the page, including font family, font weight, font size, margins, and line spacing.
How to use it:
- Tap the center of the screen while reading.
- Tap the “Aa” icon.
- Adjust font, size, spacing, and margins until the page feels comfortable.
Readability directly affects concentration. Text that is too small causes squinting and fatigue. Text that is too cramped makes it harder to track lines. Adjusting these settings during a long study session can meaningfully reduce eye strain. The limitation is that fixed-layout files, like many PDFs, cannot reflow, so these settings will not apply to them.
Tip 7 — Optimize Brightness and Warm Light
Kindle Paperwhite, Signature Edition, Colorsoft, and Scribe models include adjustable warm light, which shifts the screen’s white light toward a warmer amber tone. The base Kindle has adjustable brightness only, without a warm light option.
How to use it:
- Swipe down from the top of the screen to open quick settings.
- Adjust the brightness slider for daytime or nighttime reading.
- Adjust the warm light slider, or schedule it to turn on automatically in the evening.
Lower brightness and warmer light are easier on the eyes during long night study sessions, and warm light in particular can reduce the kind of blue light exposure that interferes with sleep. This feature is not available on the entry-level Kindle, so students who study mostly at night may want to consider a Paperwhite or higher model.
Tip 8 — Read in Landscape Mode
Landscape mode rotates the entire display, which changes how content is laid out on the page.
How to use it:
- Turn off screen rotation lock in the quick settings menu.
- Physically rotate the device.
This is particularly useful for wide tables, side-by-side diagrams, or PDFs originally formatted for a standard sheet of paper. Textbooks with charts or data tables often become far more readable in landscape mode. The limitation is that rotation applies to the whole interface, not just the page, so navigating menus can feel slightly different afterward.
Tip 9 — Customize Page Refresh
E Ink screens occasionally show faint “ghosting,” or traces of the previous page. Kindle can be set to refresh the full page more or less often to manage this.
How to use it:
- Open the reading options menu.
- Look for the page refresh or screen refresh setting, if available on the device.
- Choose a more frequent refresh for a cleaner page, or a less frequent refresh to save battery and speed up page turns.
This setting matters most during long reading sessions, where ghosting becomes more noticeable, or for students trying to stretch battery life during travel. Availability varies by device and software version, so not every Kindle offers a manual refresh setting.
Tip 10 — Use Reading Ruler (Where Supported)
Reading Ruler places a highlighted band over a single line or paragraph, dimming the rest of the page. It is available in the Kindle app for iOS and Android and on select Kindle devices.
How to use it:
- Open the accessibility settings menu.
- Turn on Reading Ruler.
- Choose between line mode and paragraph mode.
This feature helps readers who struggle to stay focused on long pages, and it is often recommended for students with dyslexia or attention difficulties, since it reduces visual clutter around the current line. It also helps during late-night study sessions, when reading fatigue makes it easy to lose your place. Availability differs across devices, so it’s worth checking the accessibility menu on a specific model before relying on it.
Tip 11 — Read PDFs More Efficiently
Kindle can display native PDFs, which preserve the original page layout instead of reflowing text like a normal e-book.
How to use it:
- Send the PDF to the device using Send to Kindle.
- Switch to landscape mode for wider layouts.
- Use the crop or panel view options to zoom into a specific section of a dense page.
This matters for textbooks, research papers, or scanned lecture notes that need to keep their original formatting. The limitation is real: PDFs do not reflow, so small text can be difficult to read on a 6- or 7-inch screen, and complex or color-heavy diagrams do not display well on grayscale devices. For heavy PDF use, an 11-inch Kindle Scribe handles this far better than a standard Kindle, and a tablet may be a better option than any Kindle for color-dependent material.
Tip 12 — Send Study Material to Kindle
Send to Kindle is Amazon’s service for getting personal files onto a Kindle library. It supports EPUB, DOCX, PDF, and several other formats.
How to use it:
- Email the file as an attachment to the Kindle’s personal email address, or
- Use the Send to Kindle app or browser extension on a computer.
- Confirm the sending email address is on the approved senders list in Amazon’s account settings.
This is the main way to get lecture slides, class readings, or a thesis draft onto a Kindle. Formatting from DOCX files can shift slightly during conversion, and there are file size limits depending on the method used, so very large PDFs may need to be split or compressed first.
Tip 13 — Convert Web Articles into Reading Material
Long articles and research pieces are often easier to read on a Kindle than in a browser tab full of ads and notifications.
How to use it:
- Install the Send to Kindle browser extension.
- Open the article and click the extension icon to send it to the device.
This is useful for research reading lists and long-form journalism that would otherwise get lost in open browser tabs. Note that Pocket, once a common tool for this kind of reading list, shut down in 2025, so students who used it will need a different service, such as Instapaper or Raindrop.io, to collect articles before sending them along. Paywalled pages and complex web layouts sometimes convert poorly, so this method works best on standard text-based articles.
Tip 14 — Organize Books Using Collections
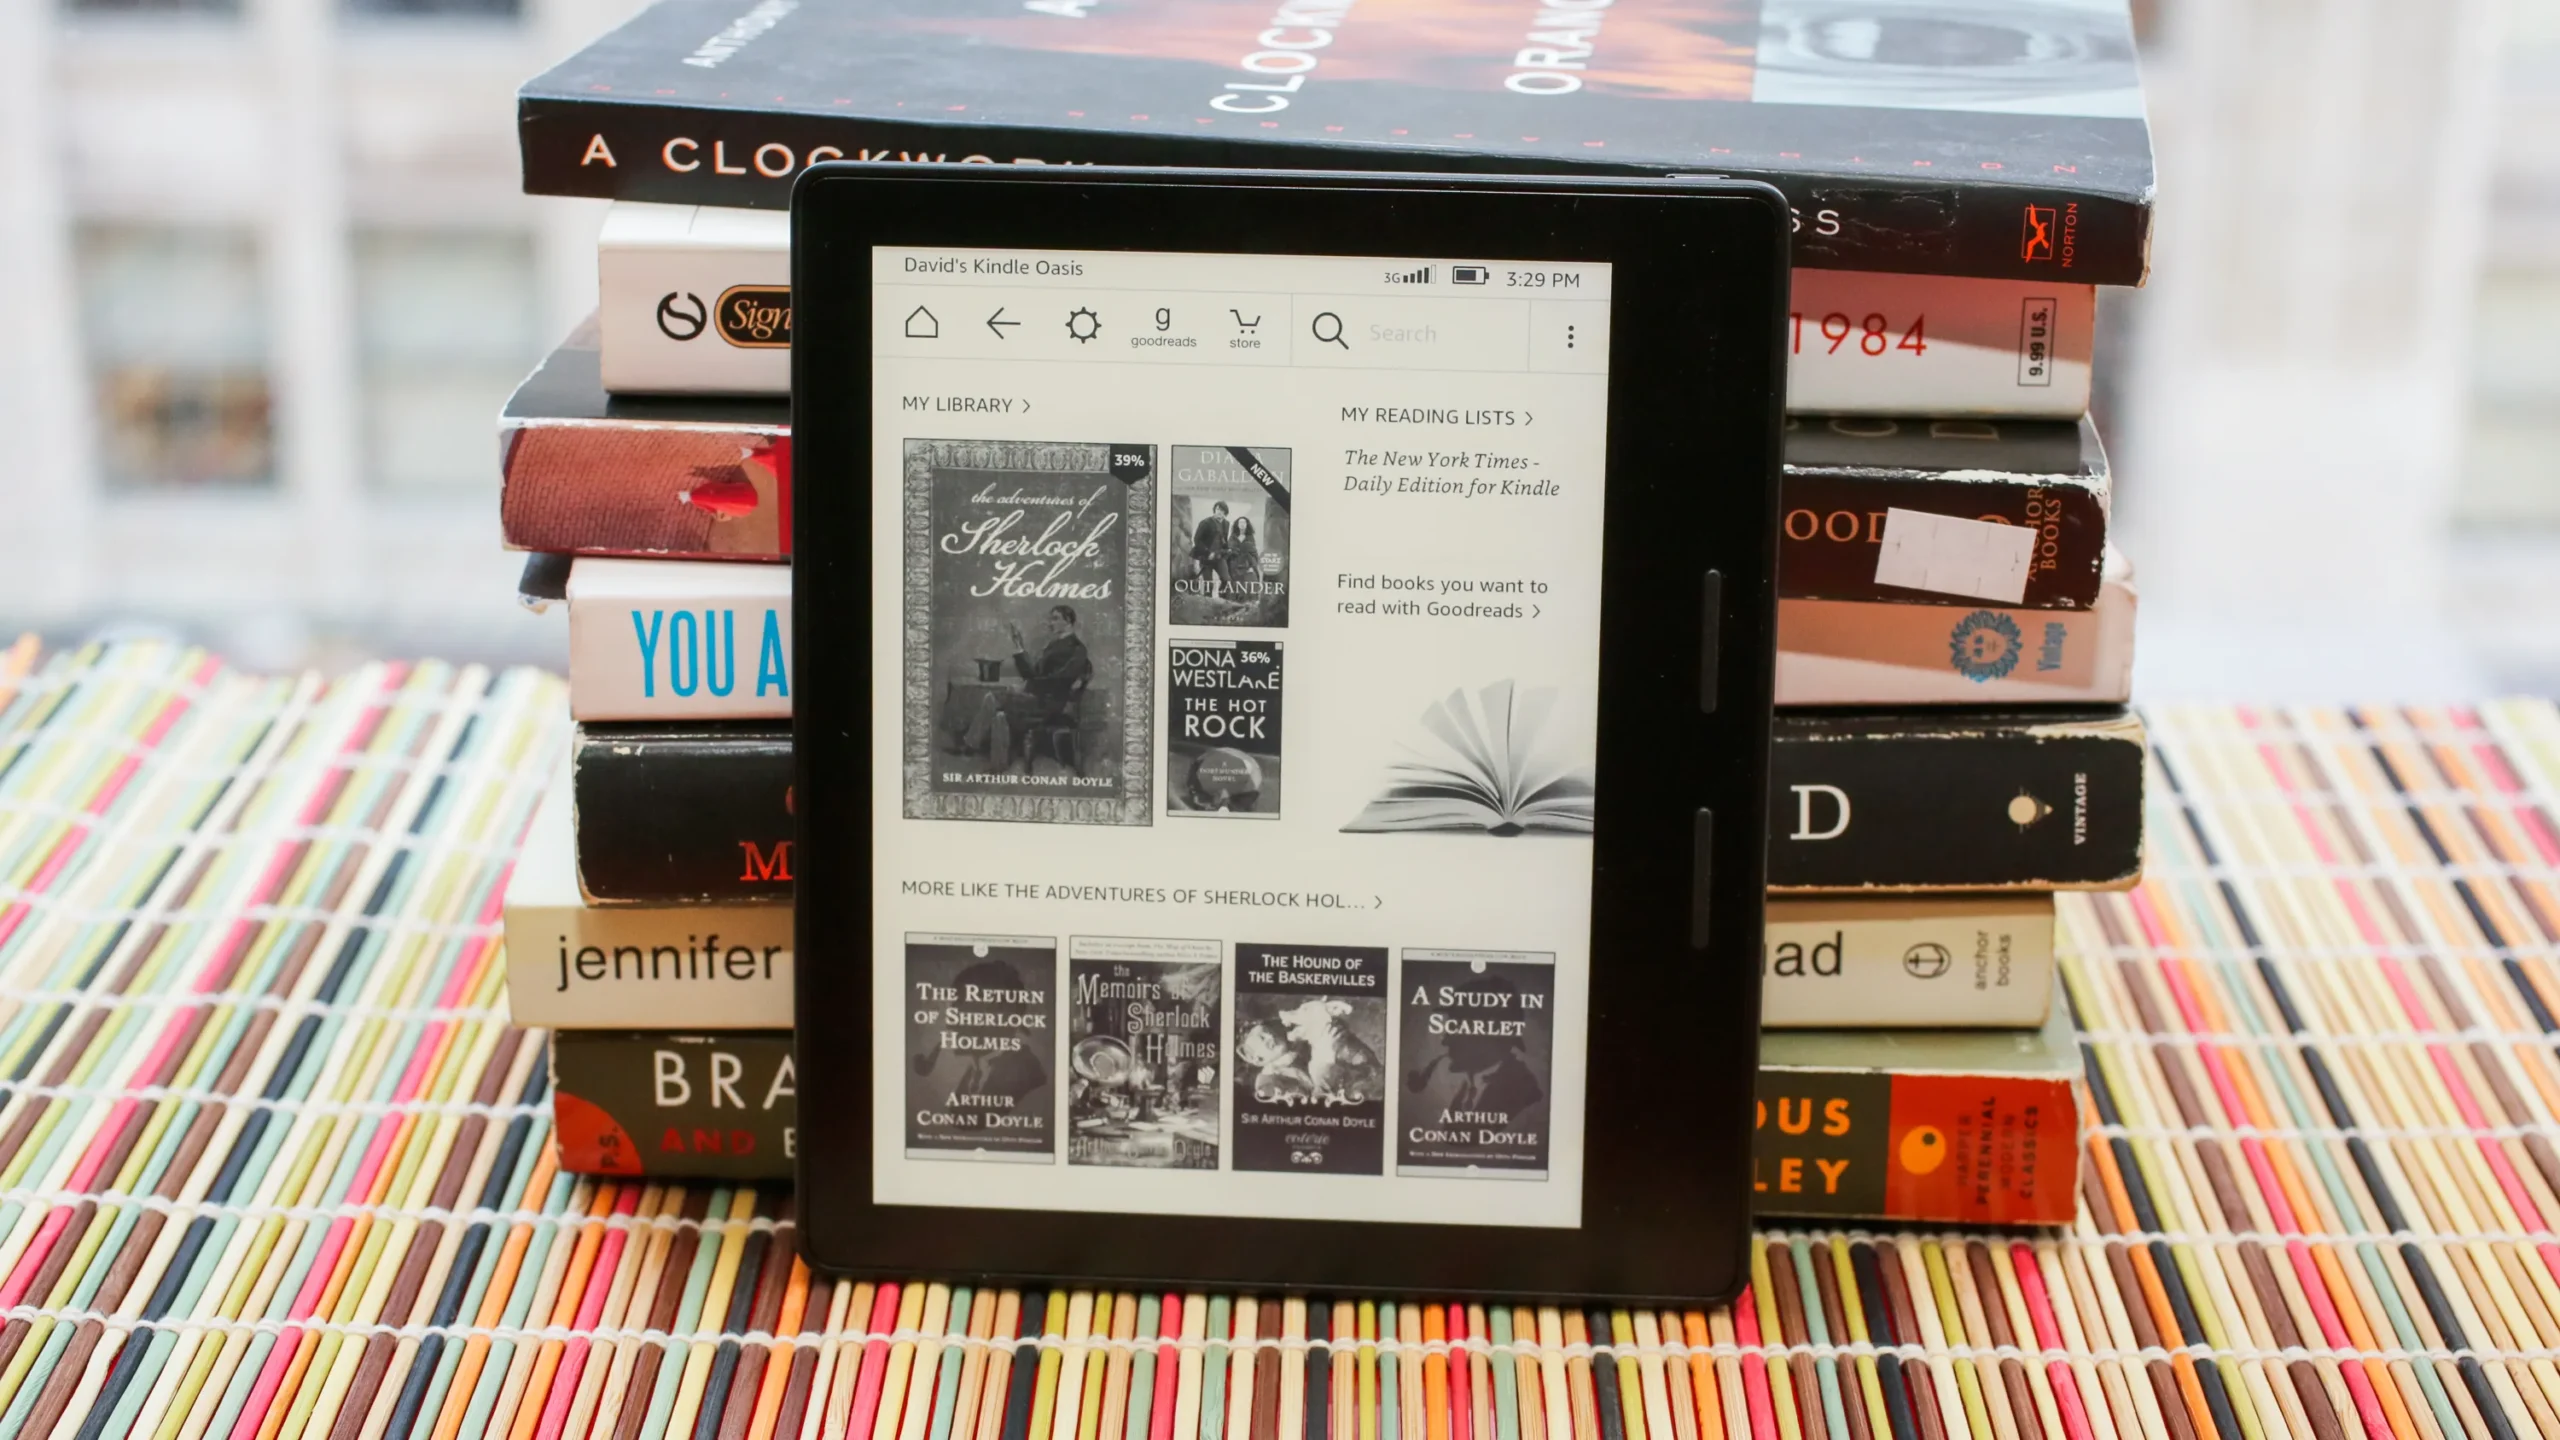
Collections work like folders for a Kindle library, letting students group books and documents by subject instead of scrolling through one long list.
How to use it:
- Open the library and select “Create New Collection.”
- Name it and add relevant titles.
A student might create collections such as Semester 1, History, Biology, Exam Prep, and Research. This becomes useful the moment a library grows past 20 or 30 titles, which happens quickly once lecture notes, PDFs, and assigned reading start piling up. There is no real limitation here beyond the small effort of setting collections up in the first place.
Tip 15 — Search Inside Books
Kindle can search the full text of a book instantly, rather than requiring a student to remember which chapter something appeared in.
How to use it:
- Tap the search icon while reading.
- Type a keyword, name, or phrase.
- Tap any result to jump straight to that page.
This is extremely useful during revision, when a student needs to find every mention of a specific term, case, or character across an entire book. It also helps when writing a paper and needing to relocate a specific quote without rereading the whole text.
Tip 16 — Use X-Ray (Where Available)
X-Ray provides background information on people, places, and terms that appear in a book, along with how often each one shows up.
How to use it:
- Tap the menu while reading and select X-Ray.
- Browse the list of people, terms, or places.
- Tap any entry to see where it appears throughout the book.
This is useful in both fiction and nonfiction. In a novel, it helps track characters across hundreds of pages. In a history or nonfiction book, it helps track recurring names, events, or concepts. The main limitation is availability. X-Ray only works on books where Amazon or the publisher has added the data, so not every title supports it.
Tip 17 — Check Reading Progress
Kindle tracks how much of a book is left, both in time and in pages, based on the reader’s own reading speed.
How to use it: It is visible automatically at the bottom of the screen while reading, showing time left in the chapter and time left in the book.
Reading progress is more than a curiosity. Students can use it to plan study sessions realistically, such as deciding whether a chapter can be finished before a class starts or needs to be split across two sessions.
Tip 18 — Read Sample Chapters Before Buying Textbooks
Kindle lets readers download a free sample of most books before buying, usually the first chapter or so.
How to use it:
- Find the book in the Kindle Store.
- Tap “Send a Free Sample” instead of buying.
This is a simple way to confirm a textbook is the right edition, translation, or reading level before spending money on it. It also helps avoid buying a textbook only to discover the formatting doesn’t display well on a Kindle screen.
Tip 19 — Borrow Books Instead of Buying
Students don’t need to buy every book. Kindle Unlimited offers subscription access to a large catalog of titles. Prime Reading gives Prime members a smaller rotating selection at no extra cost. Public library e-books can also be sent to a Kindle through the Libby app.
How to use it:
- For library books, borrow a title in Libby, then choose “Read With Kindle” to deliver it to the device.
- For Kindle Unlimited or Prime Reading, browse the relevant section of the Kindle Store and borrow directly.
This is one of the most cost-effective tips in this guide for students working through long reading lists. Availability varies by country, and sending library books to Kindle through Libby currently works for U.S. library cards only.
Tip 20 — Sync Across Devices
Whispersync keeps reading position, bookmarks, highlights, and notes updated across every device signed into the same Kindle account, including phones, tablets, and computers.
How to use it:
- Install the Kindle app on a phone, tablet, or computer.
- Sign in with the same Amazon account used on the Kindle device.
- Reading progress and annotations sync automatically over Wi-Fi.
This allows a student to read a textbook chapter on a Kindle at home, then review highlights on a phone between classes, without losing their place. The main limitation is that syncing requires an internet connection, so offline reading needs a manual sync once back online.

Tip 21 — Make Use of Kindle Scribe (Optional Section)
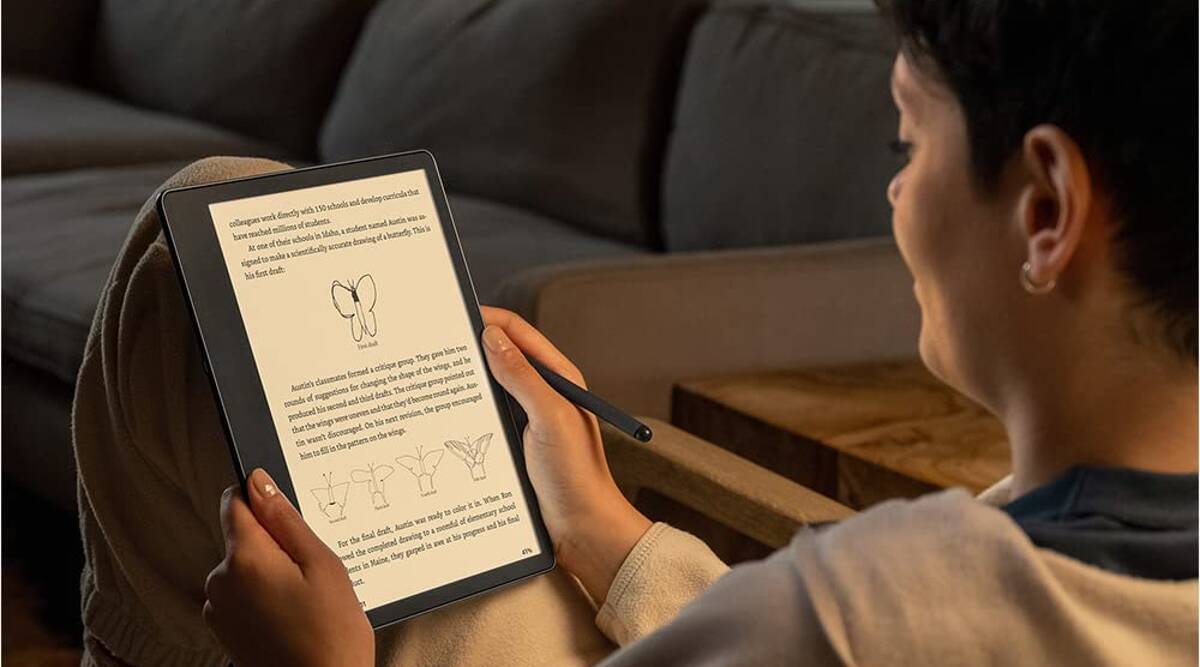
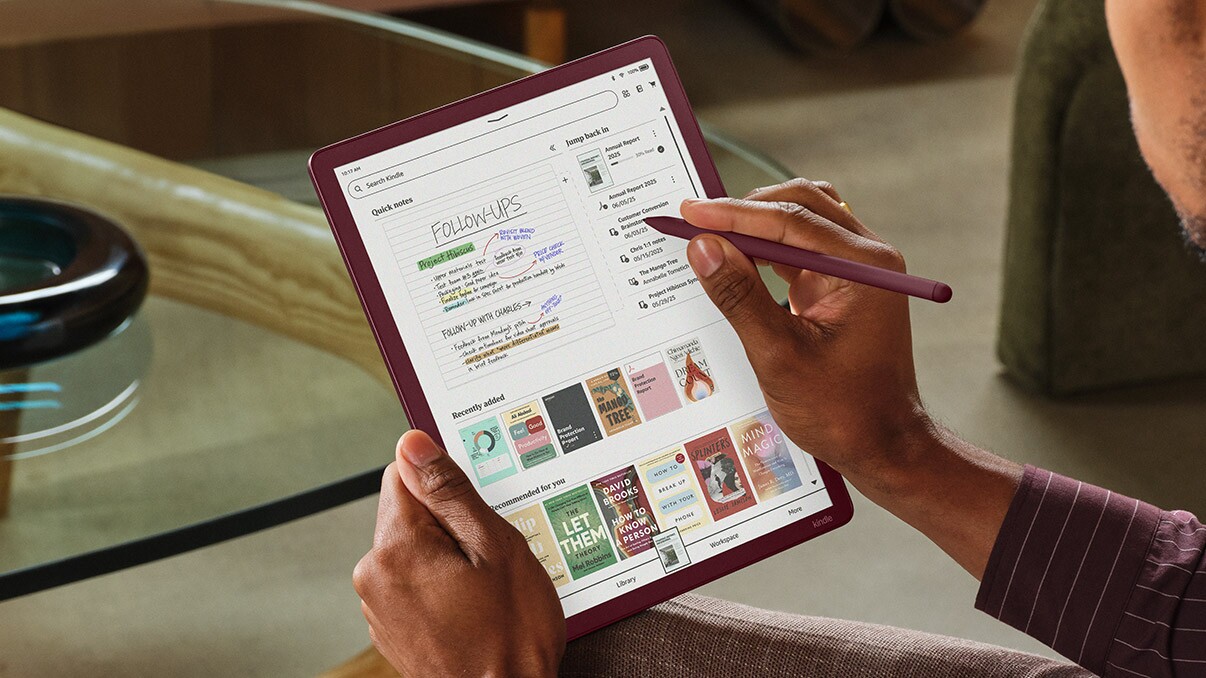
This tip applies only to Kindle Scribe owners. Scribe adds a stylus and a larger screen, which turns the device into a note-taking tool as well as a reading one.
How to use it:
- Create a new notebook from the Home screen and write directly with the stylus.
- Open a PDF and mark it up by hand instead of typing notes.
- Use built-in AI tools to convert handwriting to text or summarize long notes into bullet points.
This is useful for students who prefer handwritten notes, need to annotate PDFs directly, or want to keep lecture notes and reading notes in the same device. Notes can also be exported to services like OneNote or Google Drive. The obvious limitation is cost and size. Scribe is larger, heavier, and more expensive than a standard Kindle, so it makes sense mainly for students who take heavy handwritten notes.
Tip 22 — Take Advantage of Reading Insights
Kindle tracks basic reading habits, including streaks and time spent reading, which can be found in the reading stats section of the device or app.
How to use it: Open the Home screen and look for reading insights or reading stats, depending on the device.
This works as a simple motivation tool. Seeing a reading streak grow can encourage a student to keep up a daily habit, especially during exam preparation when consistency matters more than long, irregular study sessions.
Tip 23 — Download Books Before Traveling
Kindle content is stored locally on the device once downloaded, which means it doesn’t require an internet connection to read.
How to use it:
- Confirm all needed books, PDFs, and documents are downloaded, not just visible in the cloud library.
- Turn on airplane mode if flying, since Kindle content is still accessible without Wi-Fi.
This matters most before a flight, a commute through areas with poor signal, or any trip where reliable internet isn’t guaranteed. Anything still sitting only in the cloud library, rather than downloaded to the device, won’t be available offline.
Tip 24 — Keep Storage Organized
Even though most Kindles have limited on-device storage, every purchased or sent book stays available in the cloud library indefinitely.
How to use it:
- Remove downloaded titles that aren’t currently needed to free up on-device space.
- Re-download them anytime from the cloud library when needed again.
- Archive finished collections instead of deleting the content entirely.
This becomes relevant once a student has accumulated dozens of PDFs, lecture notes, and textbooks over several semesters. Keeping only current-semester material downloaded, and archiving the rest, keeps the device fast and easy to navigate.
Tip 25 — Build a Distraction-Free Study Routine
The most useful Kindle feature isn’t a setting at all. It’s the habit built around the device.
How to use it:
- Use the Pomodoro technique, reading in focused blocks with short breaks in between.
- Leave the phone in another room during study sessions, since Kindle itself has no social media or notifications to compete with.
- Set a daily reading or page goal instead of an open-ended one.
- Schedule a consistent weekly slot for revision using the Notebook feature from Tip 3.
None of the other 24 tips matter much without a routine to support them. A Kindle removes distraction by design, but only if a student actually uses it as their primary study device instead of switching back to a phone or laptop halfway through a session.
Bonus Section: 10 Common Mistakes Students Make on Kindle
- Highlighting everything. When every sentence is highlighted, nothing stands out during revision.
- Ignoring Collections. A disorganized library makes finding the right textbook or PDF slower than it needs to be.
- Never reviewing notes. Notes and highlights only help if a student actually revisits them before exams.
- Reading PDFs incorrectly. Skipping landscape mode or crop options makes dense PDFs harder to read than necessary.
- Never adjusting fonts. Sticking with default settings can cause unnecessary eye strain during long sessions.
- Forgetting backups. Relying only on the device without confirming files are also saved in the cloud library risks losing access if the device is lost or damaged.
- Using default settings forever. Brightness, warm light, and page refresh settings all benefit from small adjustments based on when and where a student studies.
- Buying books without samples. Skipping the free sample can lead to buying the wrong edition or a poorly formatted textbook.
- Not syncing devices. Skipping Whispersync means losing the convenience of picking up reading on a phone between classes.
- Never exploring Kindle settings. Most students use a small fraction of what the device can actually do, simply because they never checked the settings menu.
Kindle Features Students Often Overlook
- Vocabulary Builder — automatically saves looked-up words as flashcards.
- Word Wise — shows short definitions above difficult words in select books.
- Reading Ruler — highlights one line or paragraph at a time to aid focus.
- X-Ray — background information on people, places, and terms in select books.
- Collections — folders for organizing a growing library by subject.
- Page Flip — preview upcoming or earlier pages without losing the current spot.
- Notebook — a single view of every highlight and note from a book.
- Send to Kindle — the main way to move personal PDFs, DOCX, and EPUB files onto the device.
- Dark Mode — inverts text and background, useful for night reading on supported devices.
- Reading Progress — shows time left in a chapter or book based on personal reading speed.
Is Kindle Good for Students?
Kindle is a strong fit for many students, but not for every subject or every study style.
Advantages
- Distraction-free reading, with no notifications, apps, or browser tabs.
- Lightweight and portable compared to a bag full of textbooks.
- Battery life measured in weeks rather than hours.
- An E Ink screen that is easier on the eyes than a phone or laptop.
- Built-in annotation tools, including highlights and notes.
- Passive vocabulary building through Vocabulary Builder and Word Wise.
Limitations
- Color diagrams and charts don’t display well on grayscale models.
- Handwritten notes require a Kindle Scribe, which costs significantly more than a standard Kindle.
- Complex, image-heavy PDFs can be difficult to read on smaller screens.
- STEM textbooks with equations, graphs, and diagrams often work better on a tablet.
- No support for third-party study apps, unlike a tablet or laptop.
Students who mainly read novels, textbooks with plain text, PDFs, and research papers will likely find a standard Kindle more than capable. Students who rely heavily on color diagrams, handwritten annotation, or specialized study apps may be better served by a tablet, possibly alongside a Kindle for lighter reading.
Frequently Asked Questions
Is Kindle good for studying? Yes, for most reading-heavy subjects. It works especially well for plain-text textbooks, novels, PDFs, and research papers, thanks to highlighting, notes, and a distraction-free screen.
Which Kindle is best for students? A Kindle Paperwhite is a solid all-around choice, since it adds waterproofing and adjustable warm light over the base model. Students who need handwritten notes or heavy PDF use should consider a Kindle Scribe instead.
Can I annotate textbooks on Kindle? Yes. Highlights and typed notes work on any Kindle. Handwritten annotation on PDFs requires a Kindle Scribe.
Can Kindle replace physical textbooks? For text-based subjects, often yes. For subjects with heavy color diagrams or complex layouts, a Kindle usually works better as a supplement rather than a full replacement.
Can I read PDFs comfortably on Kindle? Yes, with adjustments. Landscape mode and crop tools help, but small screens and grayscale displays remain limitations for dense or color-heavy PDFs.
Is Kindle better than an iPad for studying? It depends on the subject. Kindle is better for long, distraction-free reading and eye comfort. An iPad is better for color diagrams, third-party apps, and interactive study tools.
Can I transfer lecture notes to Kindle? Yes, using Send to Kindle. DOCX, PDF, and several other formats are supported, though some formatting may shift during conversion.
Does Kindle work without Wi-Fi? Yes. Downloaded content is stored on the device and can be read offline. Wi-Fi is only needed for downloading, syncing, and features like Wikipedia lookup.
Can students use Kindle Unlimited? Yes, and it’s a cost-effective way to access a large catalog of titles through a subscription rather than buying every book individually.
Which Kindle features are most useful for exams? Highlighting, Notebook for reviewing annotations, Vocabulary Builder, search inside books, and Collections tend to matter most during exam preparation.
Conclusion
A Kindle works best when it’s used with intention, not when every feature is switched on at once. Students getting started should focus on a handful of tools first: highlighting, notes, Collections, Vocabulary Builder, and Send to Kindle. These five alone cover most of what a typical study routine needs.
From there, features like X-Ray, Reading Ruler, or Kindle Scribe’s handwriting tools can be added gradually, based on what actually helps rather than what looks impressive on a spec sheet. The goal was never to use every feature on this list. It’s to build a personalized, distraction-free system that supports better comprehension, better organization, and better long-term retention over the course of a semester, a degree, or an exam prep season.